Adding & Editing Content
An overview of how to create, edit, publish and delete content in your WordPress site.
WordPress User Guide
- WordPress Basics
- Menus & Widgets
- User Management
- Media Library
- Adding & Editing Content
- Creating Forms
- Title & Favicon
- Digital Accessibility
This documentation is intended to supplement a more formal WordPress training. The GSD encourages anyone interested in using this platform to take advantage of the courses offered through the Harvard Training Portal
Introduction to Gutenberg Blocks
This course provides an introduction to WordPress and the Gutenberg editor. Harvard Key is required to view.
Writing for the Web
Brought to you by Harvard Web Publishing. Learn digital writing best practices and gain insights into how users consume online content.
Overview
WordPress contains two main types of content: Pages (general information) and Posts (news). Each of these types of content has its own section in the WordPress navigation. Clicking into each of these sections will provide you with a list of all entries that have been created, along with options to add, edit, duplicate, or remove each entry.
When you click into an existing entry or add a new entry, you will be taken to the WordPress editor for that page. In the main area you’ll see options to add the page title and content blocks. On the right side you’ll see a Page Settings tab and a Block Settings tab. The Page Settings tab includes settings for the publishing options, the URL slug, the featured image, and parent pages.
A new page or post will look like this:

Block Editor
The GSD sites use the Gutenberg block editor to create posts and pages. This editor allows you to drag-and-drop different content blocks to create the page layout that suits your needs and your content.
Toolbar

You’ll see this toolbar at the top of the page while editing. These are tools designed to help you while you edit the page. Every editor has their own preferences, so adjust these options to create the environment you feel most comfortable working in.
On the Left
- WordPress Logo: Links you back to the dashboard,
- Plus Icon: Allows you to browse the block library and add blocks to the page
- Pencil Icon: This will allow you to toggle between the “edit” and “select” modes (useful for selecting a specific block within the page).
- Undo and Redo Arrows: Allow you to undo recent changes or redo them.
- Information Icon: Provides statistics about the content, for example, word count, number of paragraphs, headings used, etc.
- List Icon: Shows you a list of the blocks within the page content or the block group. This is useful for finding specific blocks on the page.
On the Right
- Switch to Draft: Allows you to unpublish a page and put it back into draft status.
- Preview: Allows you to view the updates you’ve made without saving.
- Update/Save: Allows you to save or update the page.
- Gear Icon: Lets you toggle the Page Setting and Block Setting sidebar on or off.
- More Icon: Additional options to customize the work area.
Adding a Block
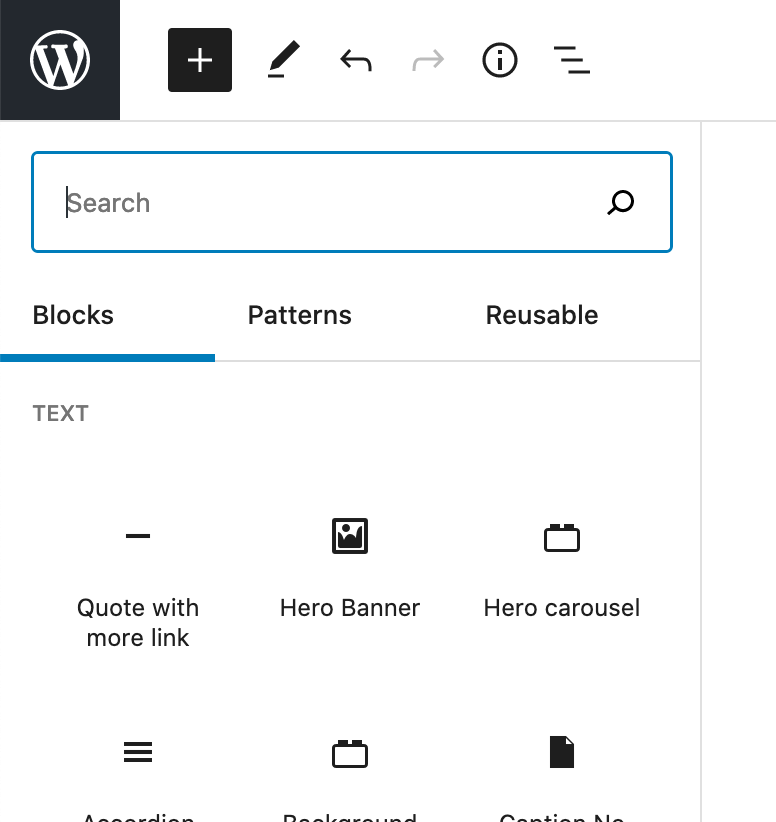
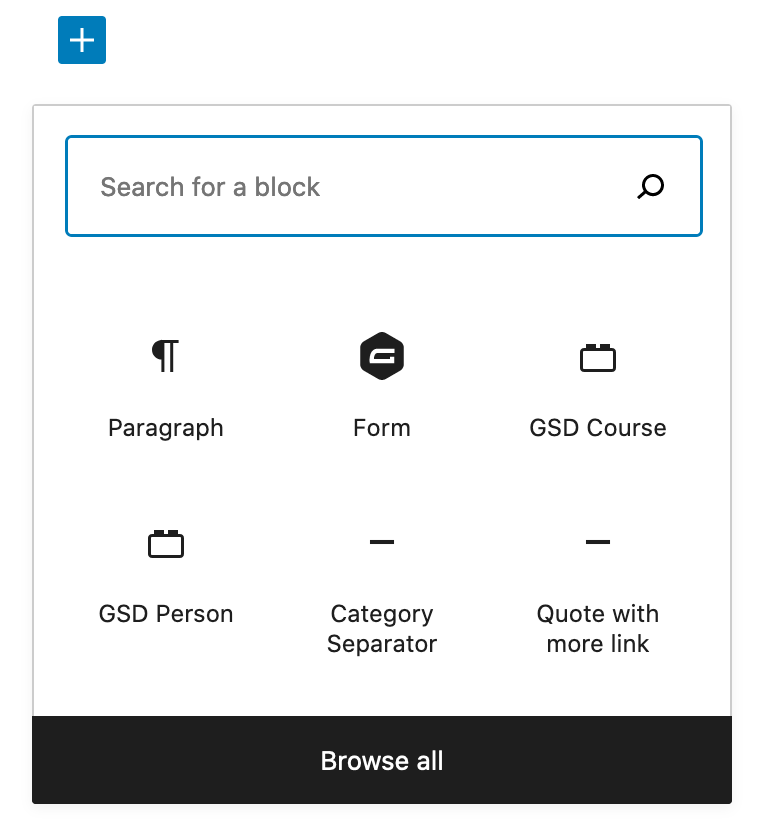
There are two methods for adding blocks to a page or post. Clicking the plus icon on the top toolbar will open a drawer on the left that shows all available blocks, while clicking the plus icon within the page editor will show a modal experience. From there you can choose what you would like to add to the page:
Editing Blocks
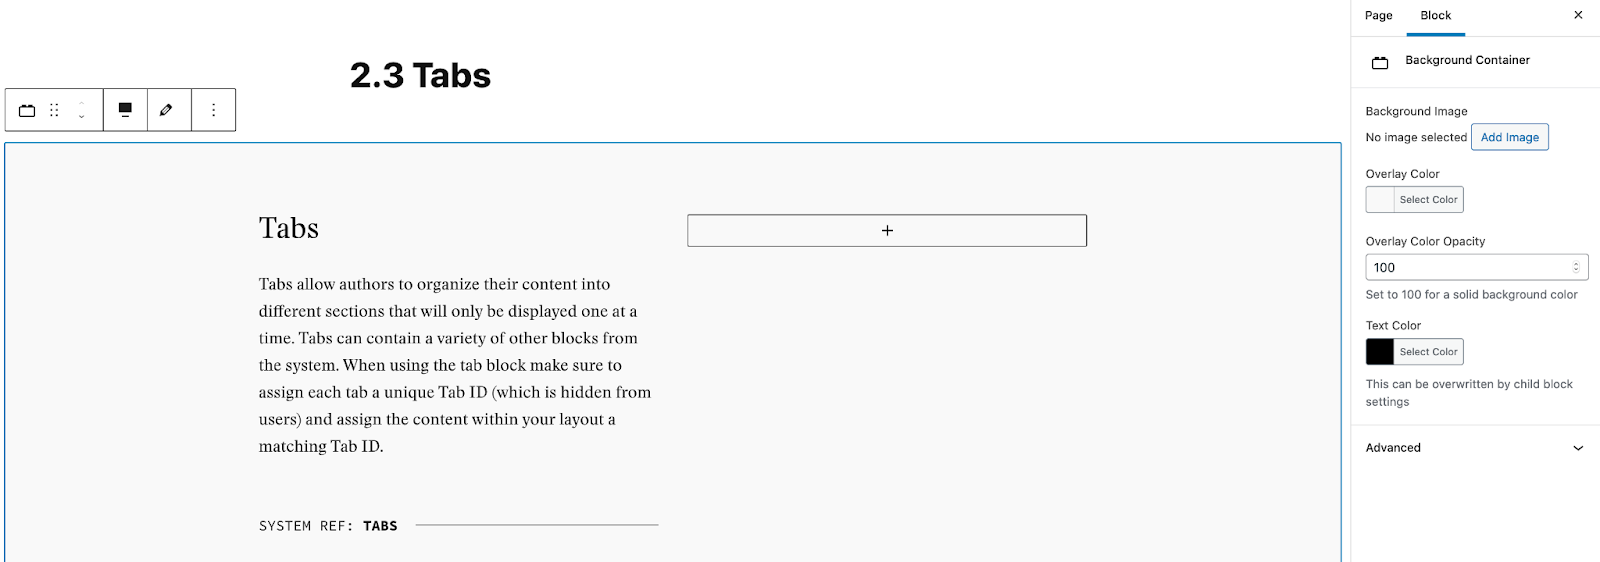
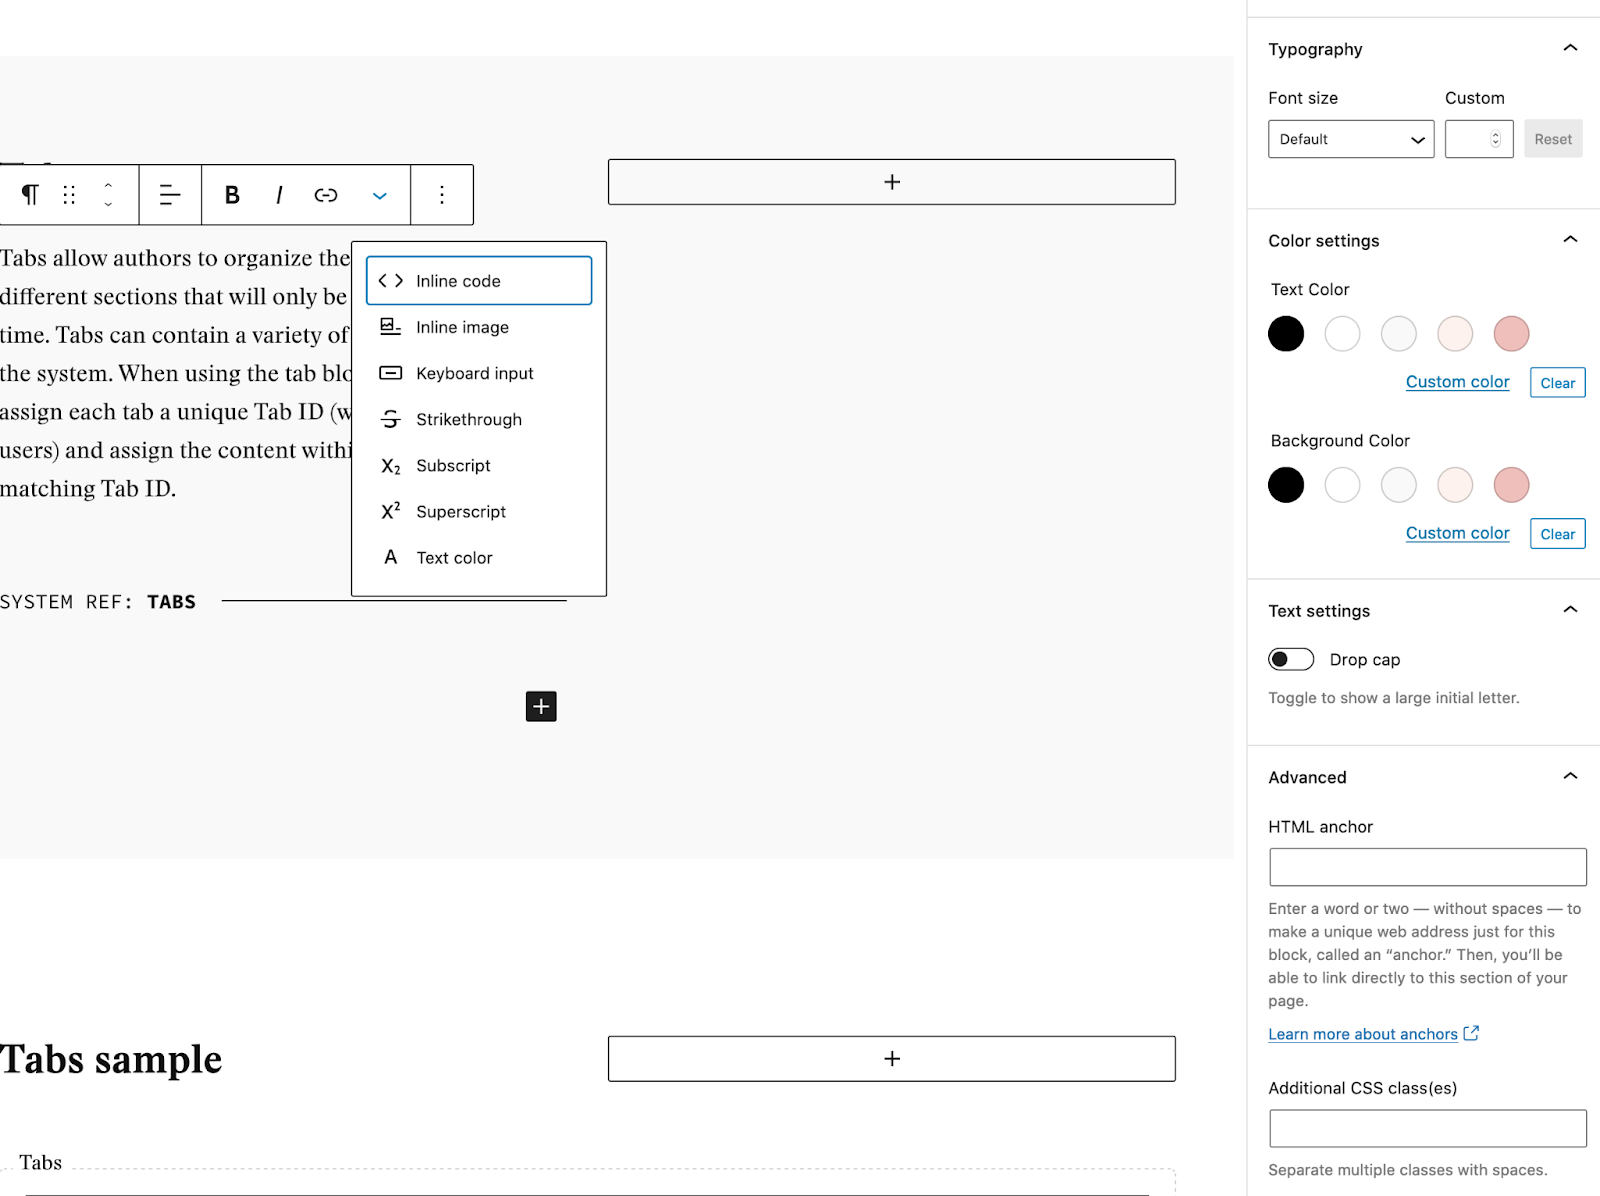
When you add a block to your page, it will appear in the editor screen. A block toolbar with setting options specific to that block will appear above it, and the Block Settings sidebar will show additional settings for that block
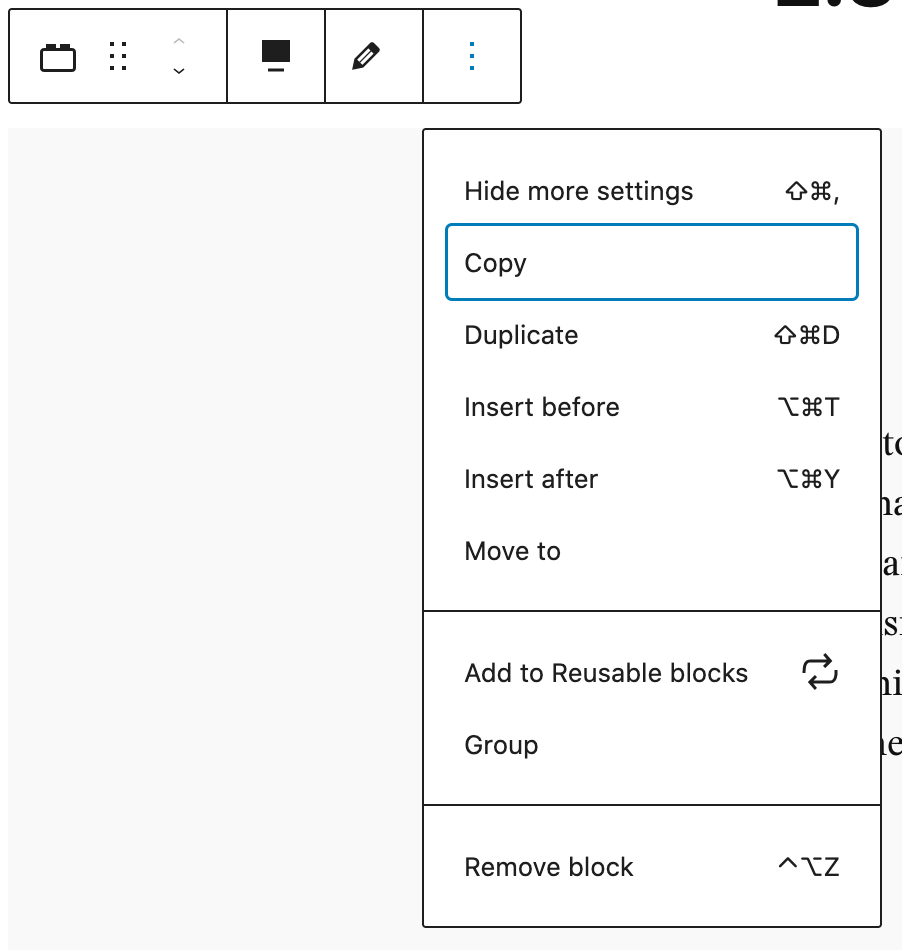
On the left-most side of the block toolbar will be an icon representing the block, followed by a handle to drag and drop the block around the page, and arrows to move the block up and down. On the right is an icon to toggle an overflow menu with additional options, such as copying and removing. The options between those will vary from block to block, but will include settings like layout, alignment, text formatting, and in certain cases an edit icon to view settings that usually show in the Block Settings sidebar.
The Block Settings tab in the right sidebar will have different options depending on the selected block, but will usually include an “advanced” panel with an option to add CSS classes to the block and an HTML anchor in certain cases. Some blocks will also include color settings that will allow you to override the global color settings for that specific block.
GSD Blocks
In addition to the default blocks that are built into WordPress, the GSD system includes several custom blocks. These blocks have been designed and developed to meet the most common needs of our subsites. In addition to providing you with WordPress support, this site offers detailed explanations of how to use these custom blocks.
Duplicating Pages
In some instances, you may want to duplicate a page because you like the layout and simply want to swap out the content. While this functionality is not built-in WordPress, we are able to leverage the Yoast Plugin to gain this functionality.

To duplicate a page:
- Open up WordPress and click on Pages in the left-hand navigation.
- Find the title of the page you want to duplicate.
- Hover over the page title and click on the Clone option.
- WordPress will then duplicate the page and set the copy as a draft.
- Open up the draft, rename it and edit as needed.
- Publish the page or save as a draft.
Rewriting & Republishing Pages
Gutenberg gives you a lot of flexibility, and you may find yourself wanting to entirely redo a page and its content. Instead of taking the page down while you tinker around with it, you can create a copy of the page and work on that while the original copy is still online. Once you are happy with your new draft, you can republish the page and immediately replace the old version with your new version. This means your page is never offline and you can retain its URL. The process to rewrite and republish a page is:
- Open up WordPress and click on Pages in the left-hand navigation.
- Find the title of the page you want to replace.
- Hover over the page title and click on the Rewrite & Republish option.
- You will then be taken to the editing screen for your new page.
- Edit as needed.
- Click the Republish button when you are ready to replace the original version of the page with your new version.
For more assistance, visit Yoast’s help guide for rewriting and republishing pages.