Media Library
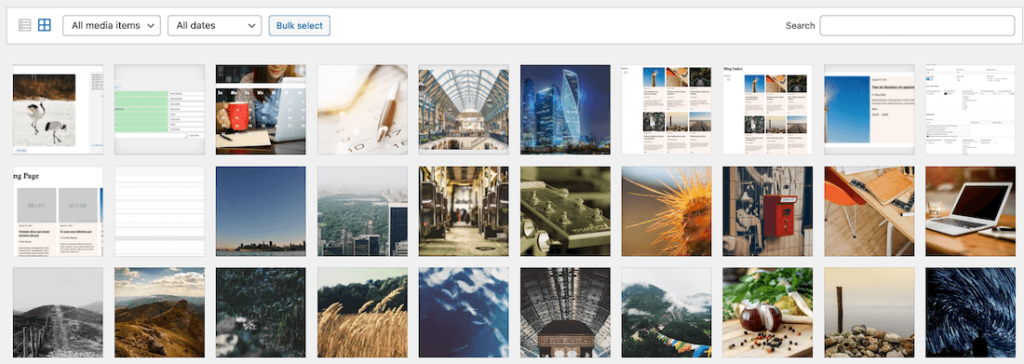
The Media Library is a repository for all images and downloads on your site.
WordPress User Guide
Overview
In your WordPress navigation, you’ll see a tab called Media Library. This contains all the images and other files that you’ve uploaded to your site.
While editing content, if you ever try to add an image, you will be shown a pop up that will ask you whether you want to choose from a file that is already in the Media Library or whether you want to upload a new file. If you upload a new file, it will automatically be added to the Media Library.

The Media Library allows you to filter by file type and date. You can also use a search bar to find your file. The search field will scan the file names, so try to use real words instead of numbers and letters when naming your files.

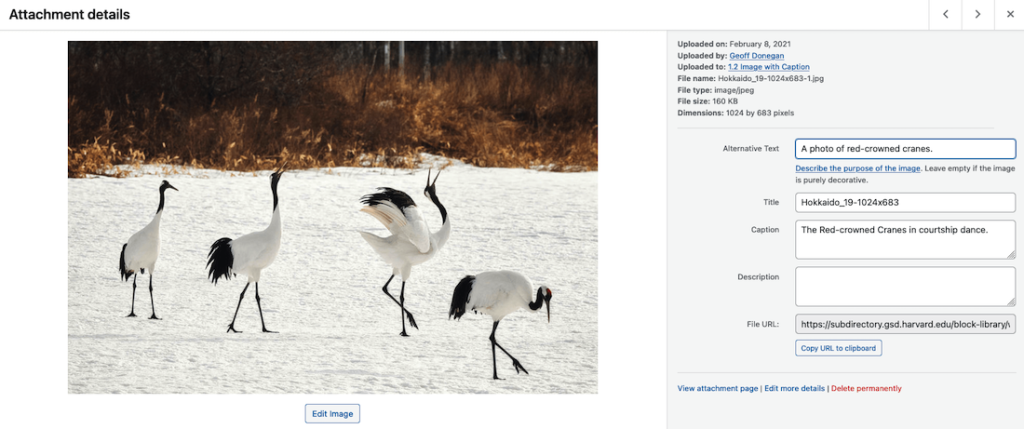
Once you’ve added a file to the Media Library, you can learn more about it by clicking into it. This will include information about when it was uploaded, the file name and size, caption, alt text, and the file URL. If you want to link to a file within your content, then use the file URL as the link.
Limitations
There are some limitations to the files that you can upload to the Media Library:
- Files must be smaller than 2MB.
- Images must be one of the following file types: .jpg, .jpeg, .png, .gif, and .webp
- Downloads must be one of the following file types: .pdf, .doc, .docx, .odt, .xls, .xlsx, .key, .ppt, .pptx, .pps, and .ppsx
- Files cannot be password-protected. If the document needs to be shared in a secure manner, then it should not be uploaded to your site. Please reach out to the Help Desk for more details and advice on alternative ways to share the document.
File Preparation
Before uploading a file to your Media Library, prepare it for digital use. This will help users access the file, while also helping with page weight.
- Images: There are some settings in WordPress that will allow you to control how an image is displayed, but WordPress is not really a photo editing tool. For the best results, prepare your image in a software designed for image editing. Crop and size the image before uploading, and compress the file to help reduce the file size. Free tools, like Tiny PNG, can help you compress images quickly.
- Downloads: While exporting your document, check to see if there are any options that will help reduce the file size. Before adding your file to the Media Library, make sure it passes web accessibility standards. Harvard’s Digital Accessibility Services offer training sessions and resources on how to make documents accessible.
In addition, make sure any documents you upload adhere to Harvard’s Copyright Policy and Data Security Policy.
